Solar panels and set-ups are a hot topic in the vanlife community. When we did the research for our system, we relied heavily on information from other travelers. So here is a rundown of what we use, why we do it, and how it works.
We often meet people by the side of the road, at the gas station, the supermarket, or wherever else we park. Big Emma is the perfect ice breaker and she would probably make a fabulous wingman. Everybody, no matter if they are male or female, young or old, likes to talk about the Bus. You might think it gets a little tiring after a while, or repetitive, but honestly, we love it. We love meeting new people and even if most conversations don’t last much longer than a few minutes, it’s almost always fun.
And while everybody seems to like the car, the things that people are interested in varies a lot. Most women seem to find the trip the most interesting part, while men often care more about the technical features of our trusty steed. And one of the questions that we get asked the most is the one from this article’s title: “Hey, I saw the metal frames on the roof. Are those solar panels?”
Yes, they are! Probably one of the best purchases we made before leaving Illinois last year was this solar panel kit and our auxiliary battery. Since a lot of people ask us about our system, here’s a rundown of what we have and how we like it.
Enough to charge all our devices
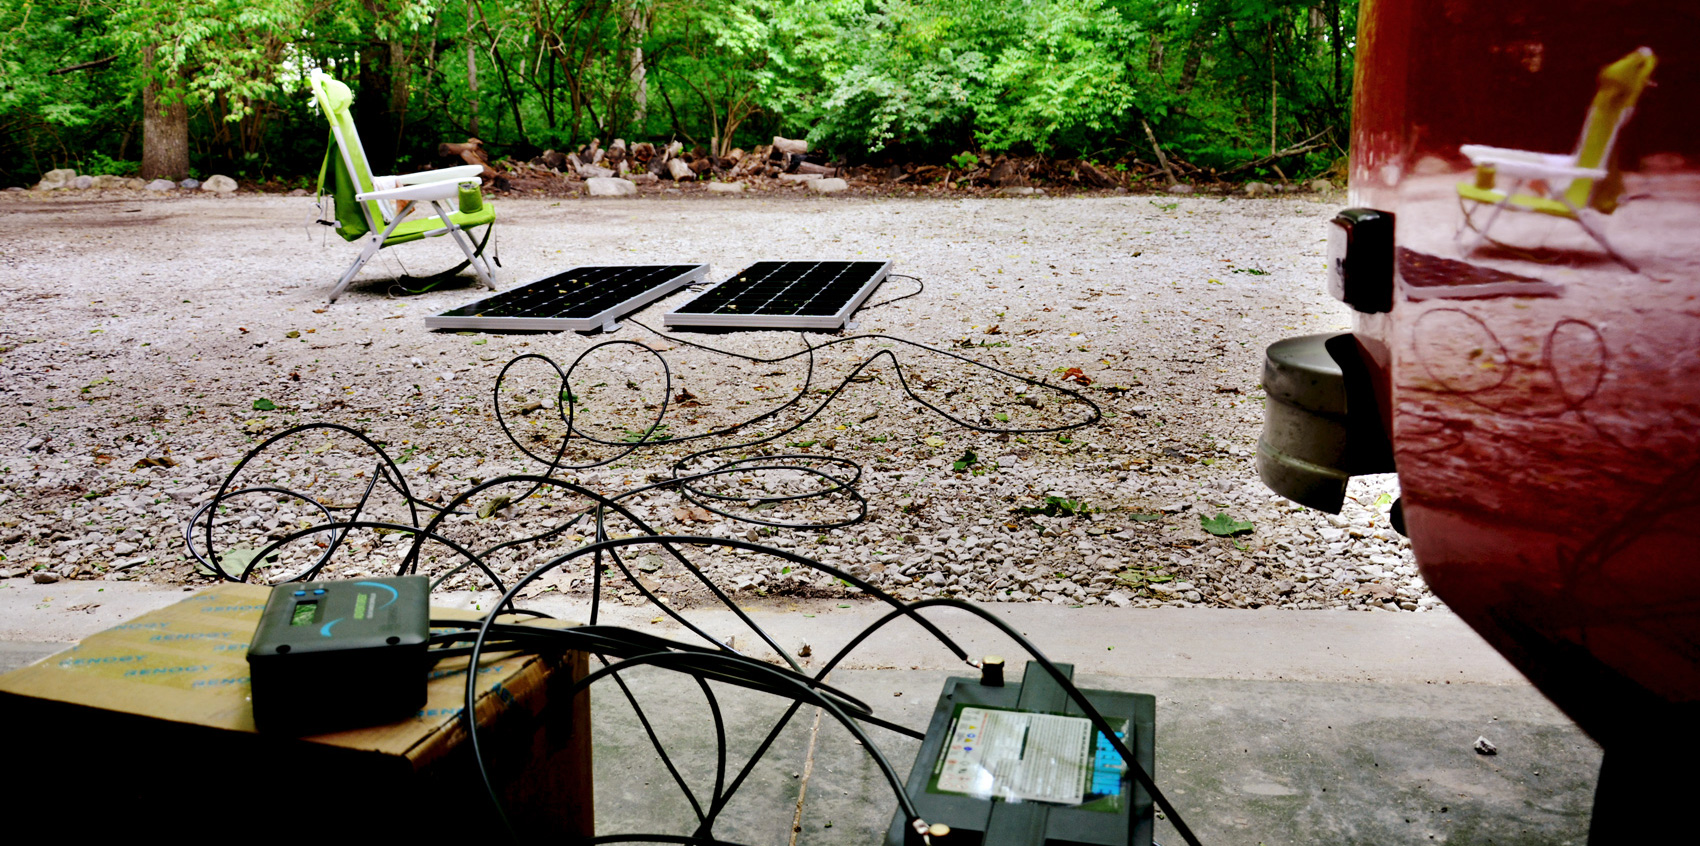
We have 2 panels mounted to the top of our roof. Each panel can output up to 100 watts, which gives us 200 watts (yeah, math!) of theoretical peak power (for comparison, a small laptop might need about 50 watts, phone chargers are usually around 15 watts). This, however, is a theoretical value that only occurs under ideal circumstances. The real world is sadly not ideal, so the actual power available to us is always lower.
The panels charge our auxiliary battery, which runs our interior lights, our fridge, and all of our power outlets. We have several USB outlets, 12-volts cigarette lighter sockets, and an inverter to plug in devices with regular household plugs.
Our auxiliary battery is in addition to our normal car battery, which runs the starter and our headlights. This is important because it means that even if we are low on power and can’t plug in our laptops, we can still (theoretically) always start the car. We are not in danger of sucking ourselves dry just because we want to watch a movie.
That’s the basic system. How do we like it? We love it! In 10 months on the road, the battery has never run dry. Up in Alaska and in the Pacific North West, where we were plagued by weeks of rain, we were close to empty a few times. But the fridge has never stopped working, and we have always had enough power to turn the lights on. If we were running low, we would try to use Internet days in cafes to charge our laptops and extra batteries, and light up some candles for some mood lighting instead.
That being said, let’s get a little more detailed for all of you who want some specifics. Here comes some tech gibberish and name dropping.
The solar panel kit
We bought the panels as part of a kit from Renogy, a popular choice among vanlifers. The kit is made for RVs and comes with the two rigid panels (there were no affordable flexible panels available when we did our research, but things change quickly, and it might be different now), all the wiring and mounting hardware you need, and a charge controller.
The controller is a little box that goes between the panels and the battery. It’s kind of the manager of the charging process, it converts voltages as needed for the charging, makes sure to stop when the battery is full, and so forth. There are different types of charge controllers available, we opted for the cheaper and slightly less efficient one, a PWM controller (PWM stands for Pulse Width Modulation). Renogy calls this basic model the “Adventurer”.
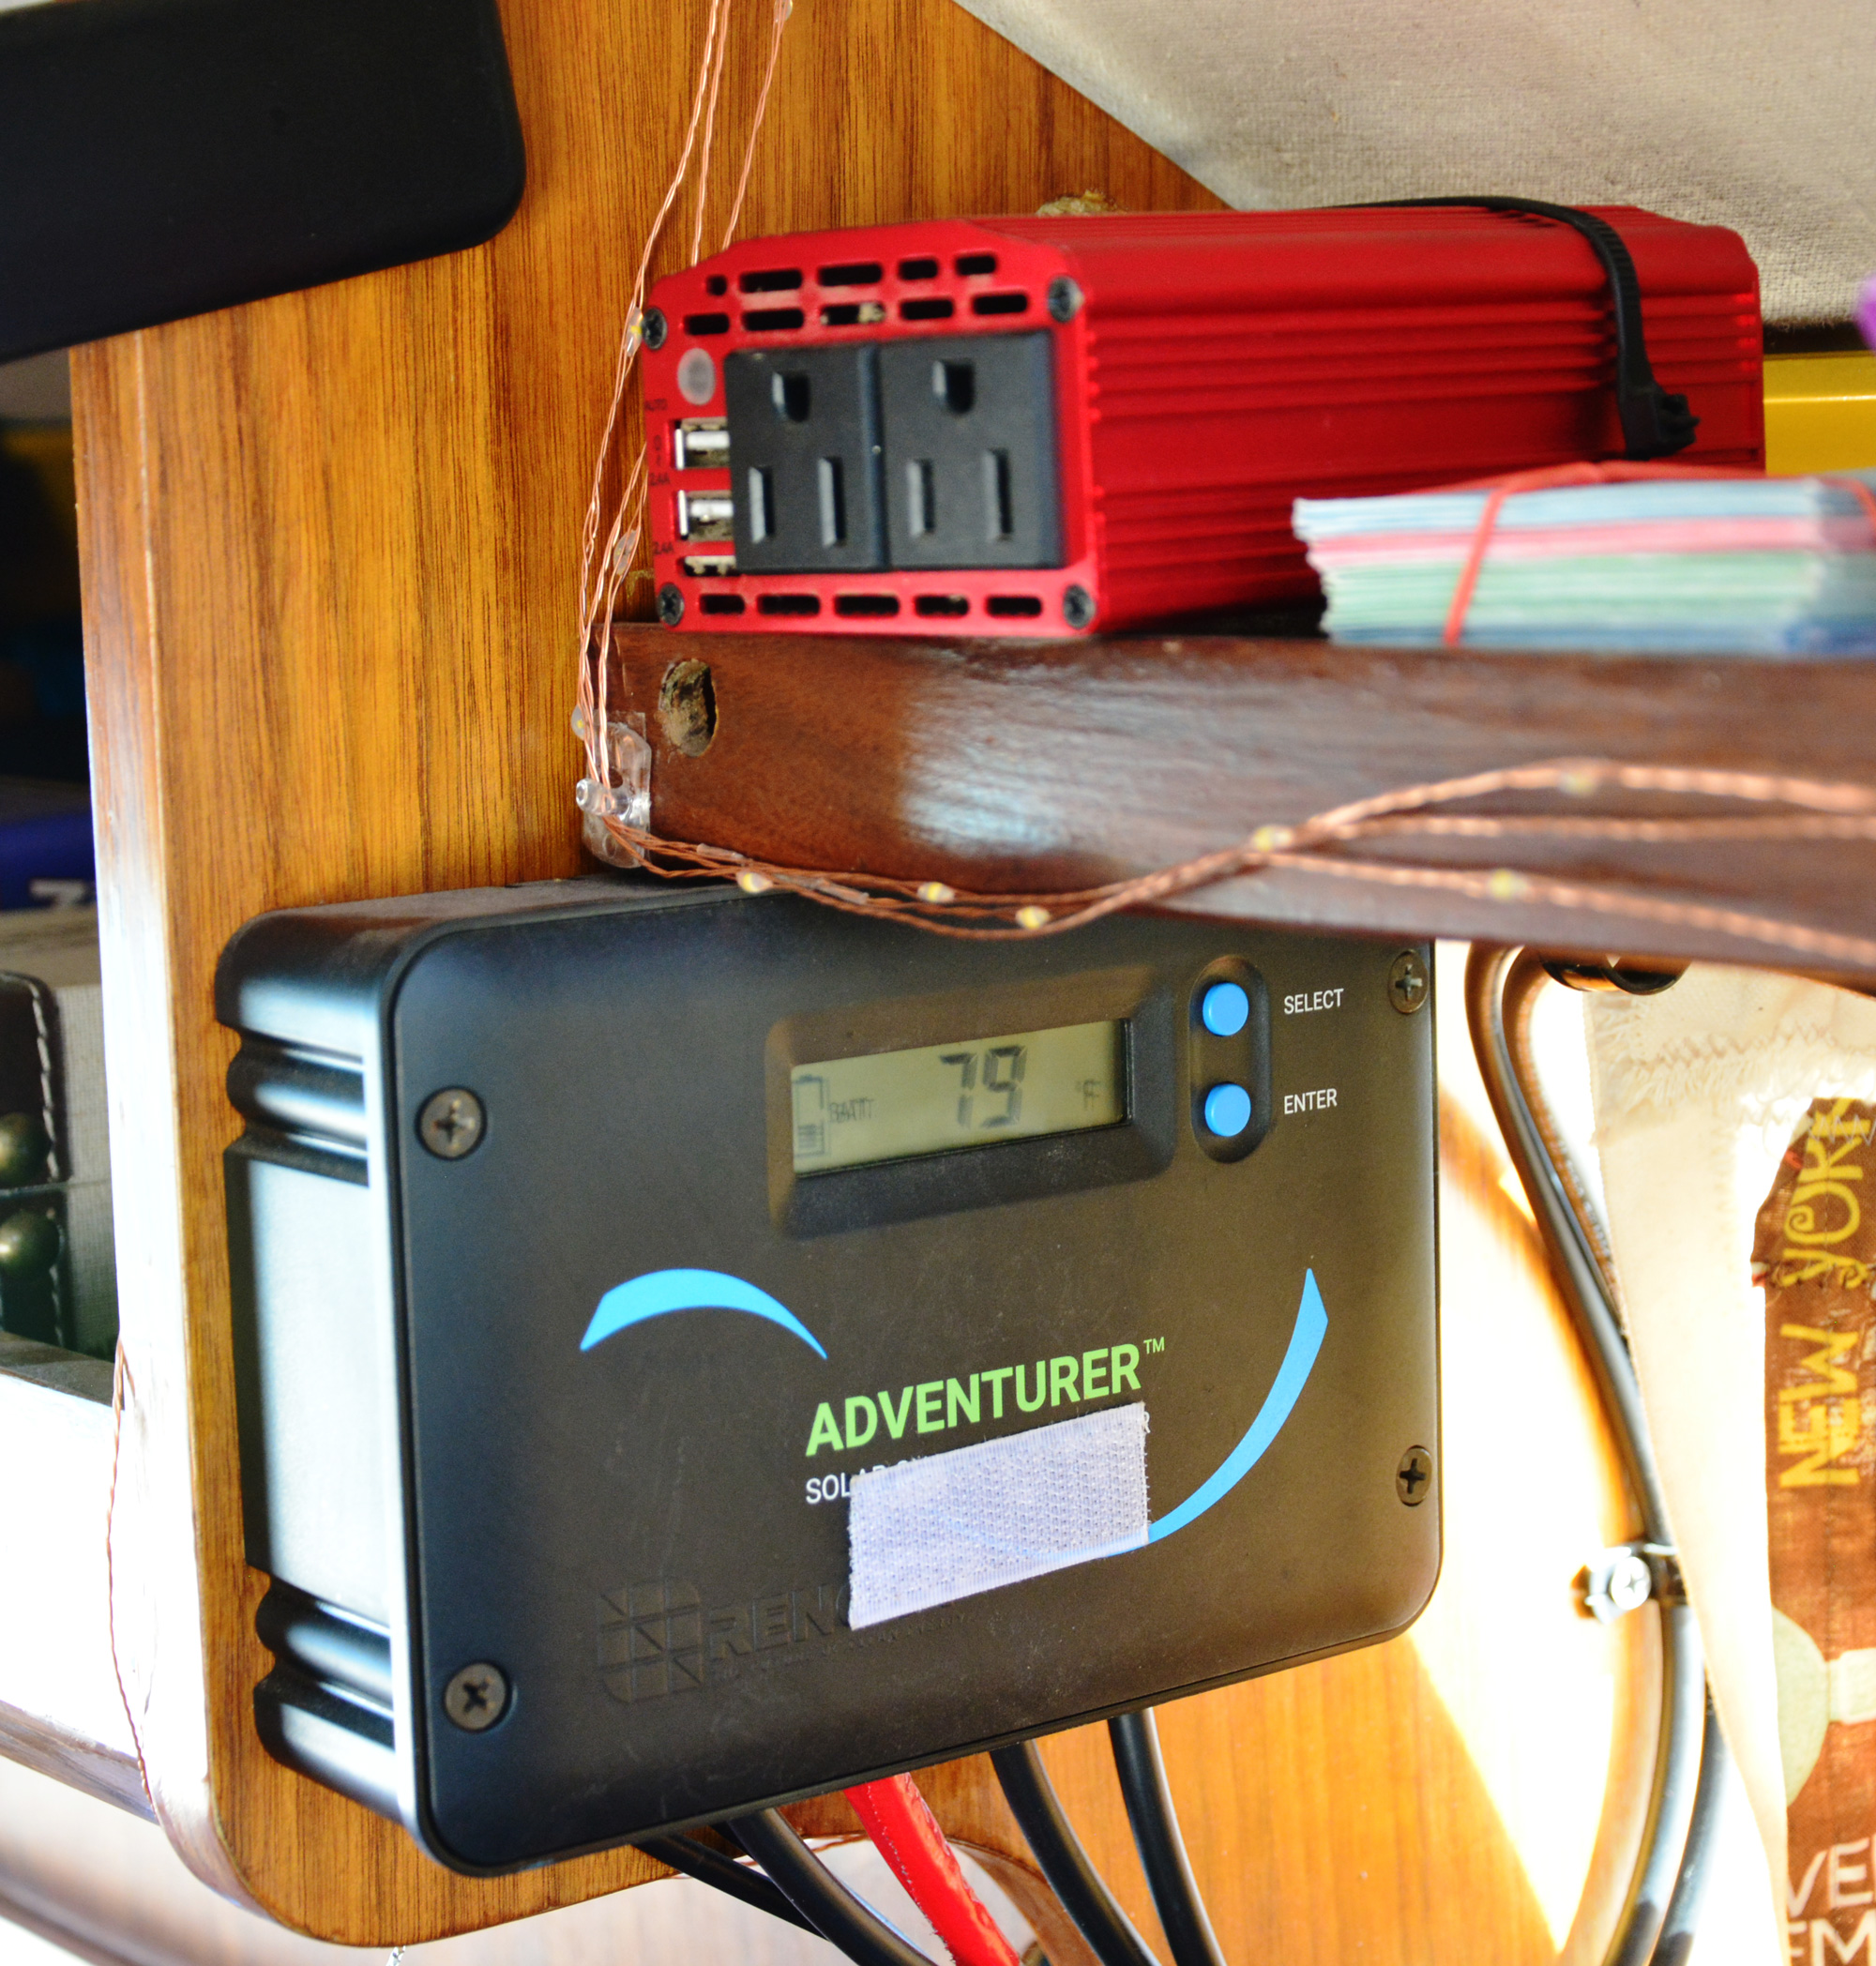
The other type of controller is an MPPT (short for Maximum Power Point Tracking), which achieves a higher efficiency by optimizing the load the panel sees for the highest possible power output, while our basic model just turns a switch on and off that connects and disconnects the panel from the battery. If this didn’t make any sense to you, don’t worry, it doesn’t have to. Just know there are two different types of charge controllers.
The battery, a pricey thing
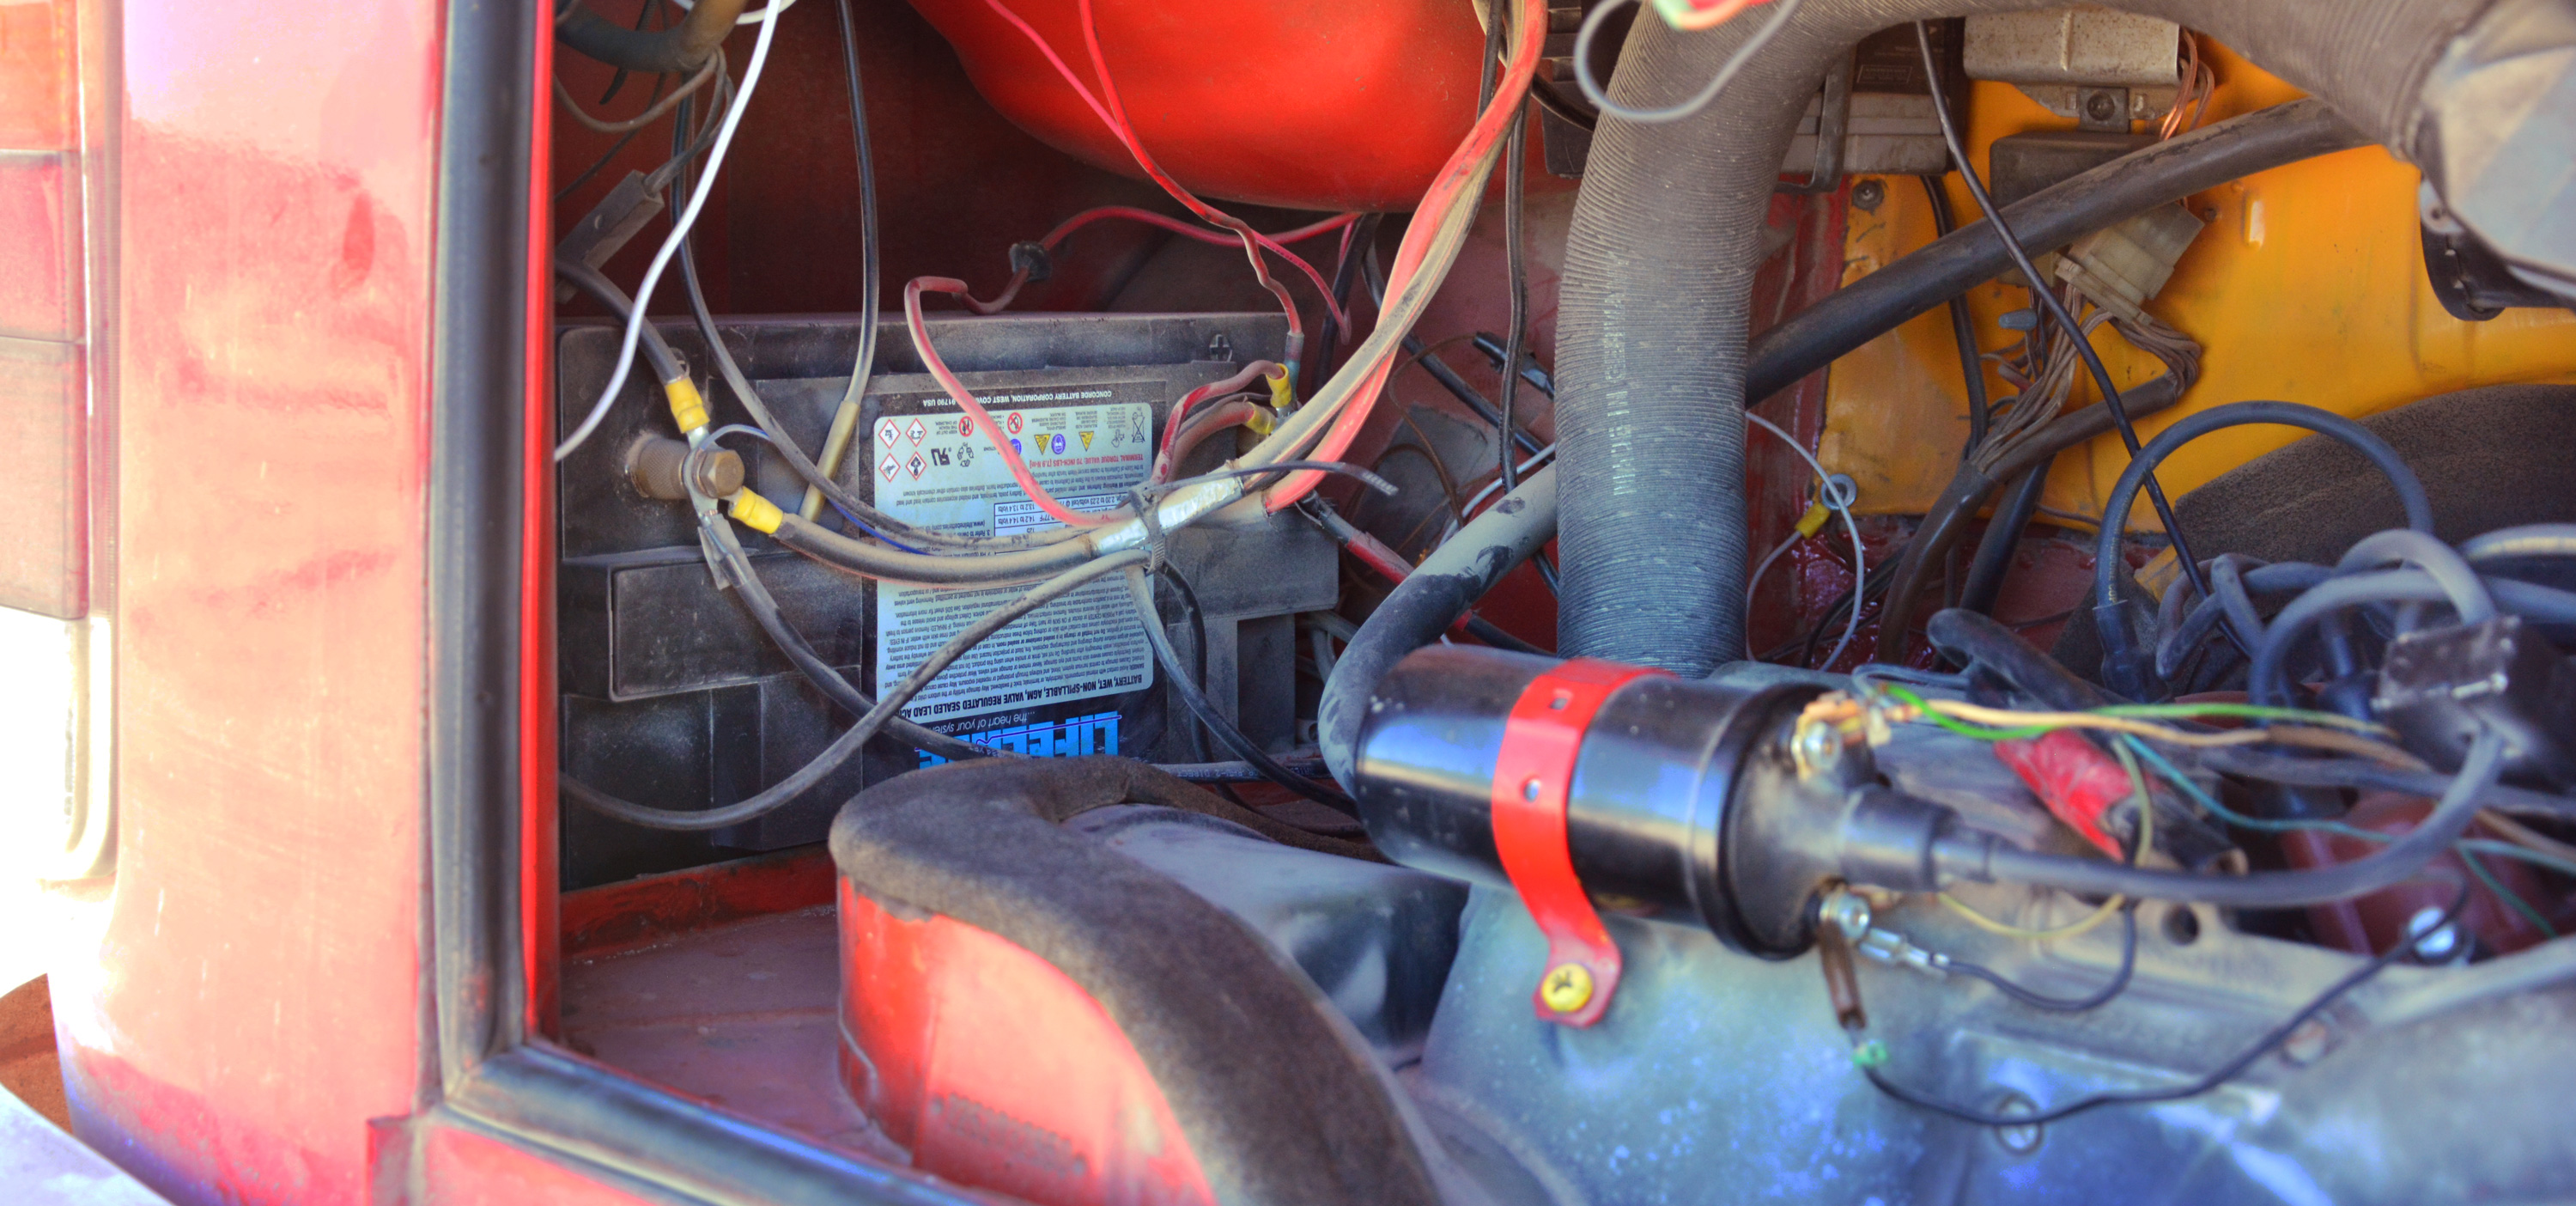
So now you know about our charging system, what’s still missing is the battery. We have two batteries in the car: the starter and the auxiliary. The starter battery starts the car (who would have thought?) and runs the headlights and all other lights associated with the vehicle part of our home. It is charged - like in every regular car - by the alternator in the engine. The other battery is our auxiliary battery, and it runs everything that has to do with living in our car. Our fridge, our inside lights, our fans, our outlets. Because regular car batteries don’t like being discharged below 50%, we chose a so-called deep cycle battery for the job. They are still affected by deep discharging (as in, they live less long), but they cope with being discharged better than regular car batteries do.
During our research before buying our solar setup, we found that many people said it would be worth it to invest in a more expensive battery. It would eventually pay off, they said, as the battery lasts longer and we won’t need a new one anytime soon. I don’t know if that’s true, but we did buy a quite pricey thing (around $400 USD) and so far it hasn’t failed us. The battery we have is a Lifeline GPL-31XT battery.
Our battery has a capacity of 125Ah, meaning it can (again, this is an ideal world maximum value) store and release 1 ampere of current for 125 hours. Or 2 amperes for 62.5 hours, or 4 amperes for.. well, you get the idea. Our battery happens to be an AGM battery, which stands for absorbed glass mat and describes more or less accurately what you’d find would you cut the thing open: the gel inside is absorbed by fiberglass mats, which keeps it from jellying around. I’m sure is also good for its electrical characteristics, although I have no clue why. However, the cool thing about these batteries: they can be run lying on their side or even upside down, while traditional acid or gel batteries would leak and release their toxic intestines into the car.
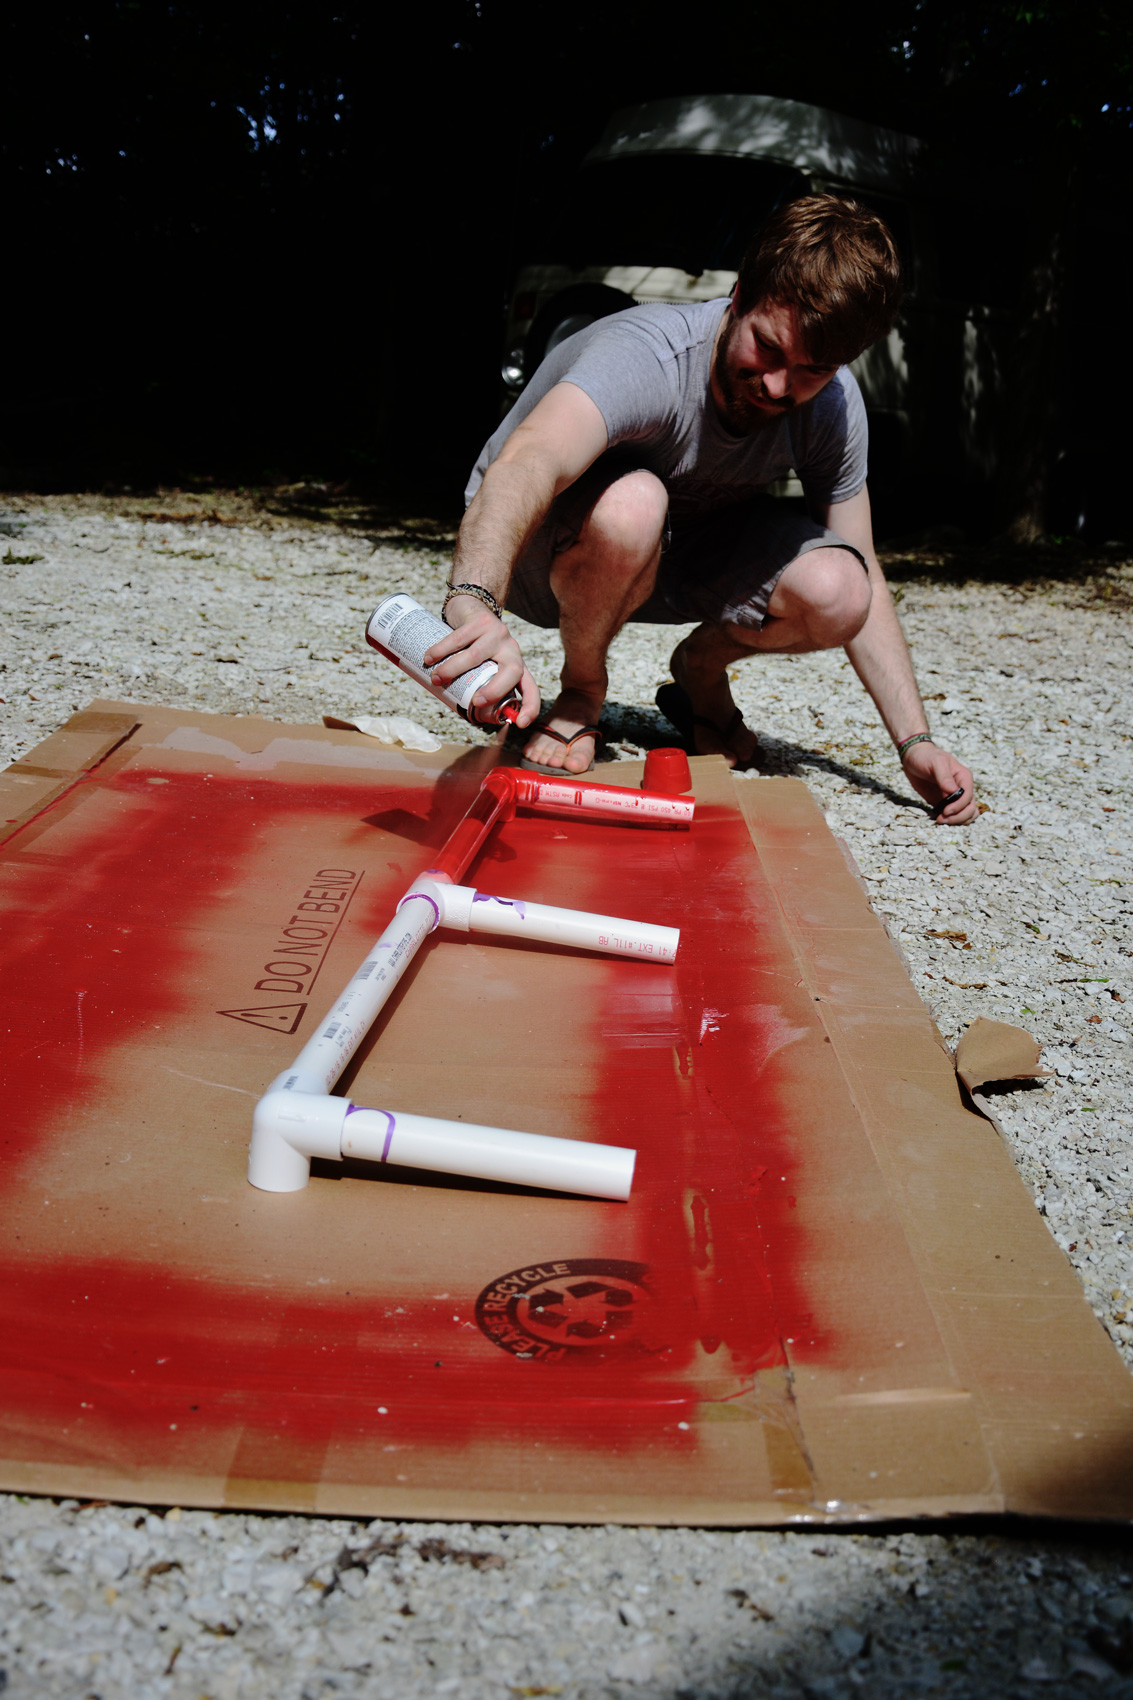
Mounting and installation: unique but effective
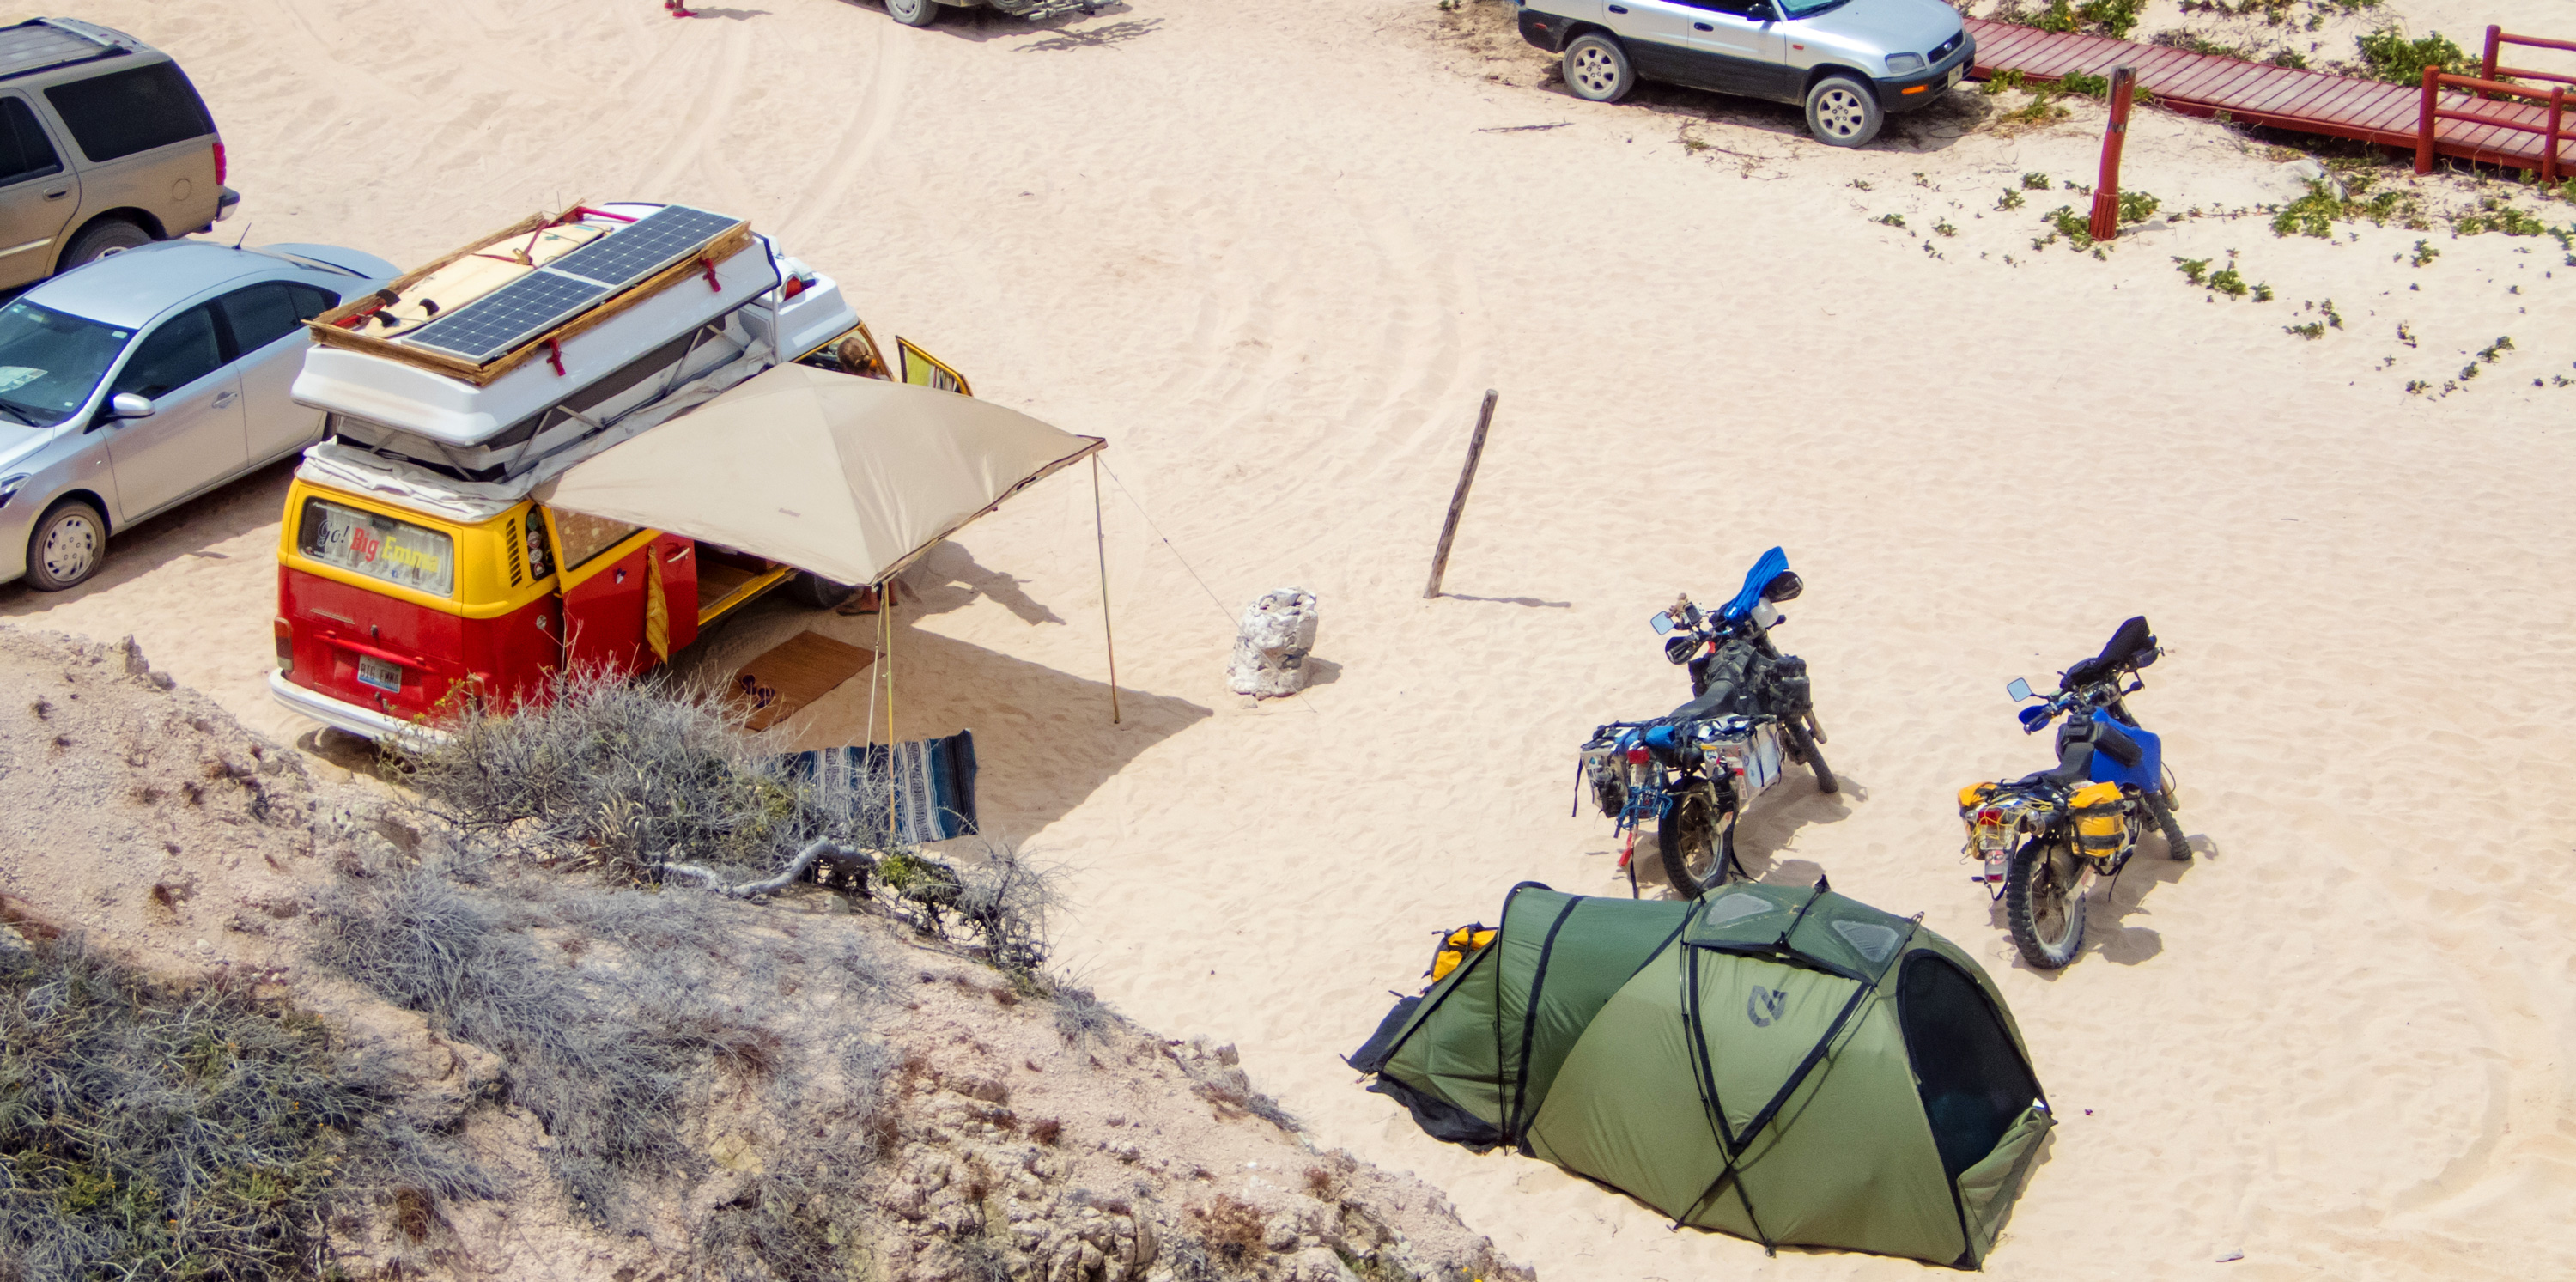
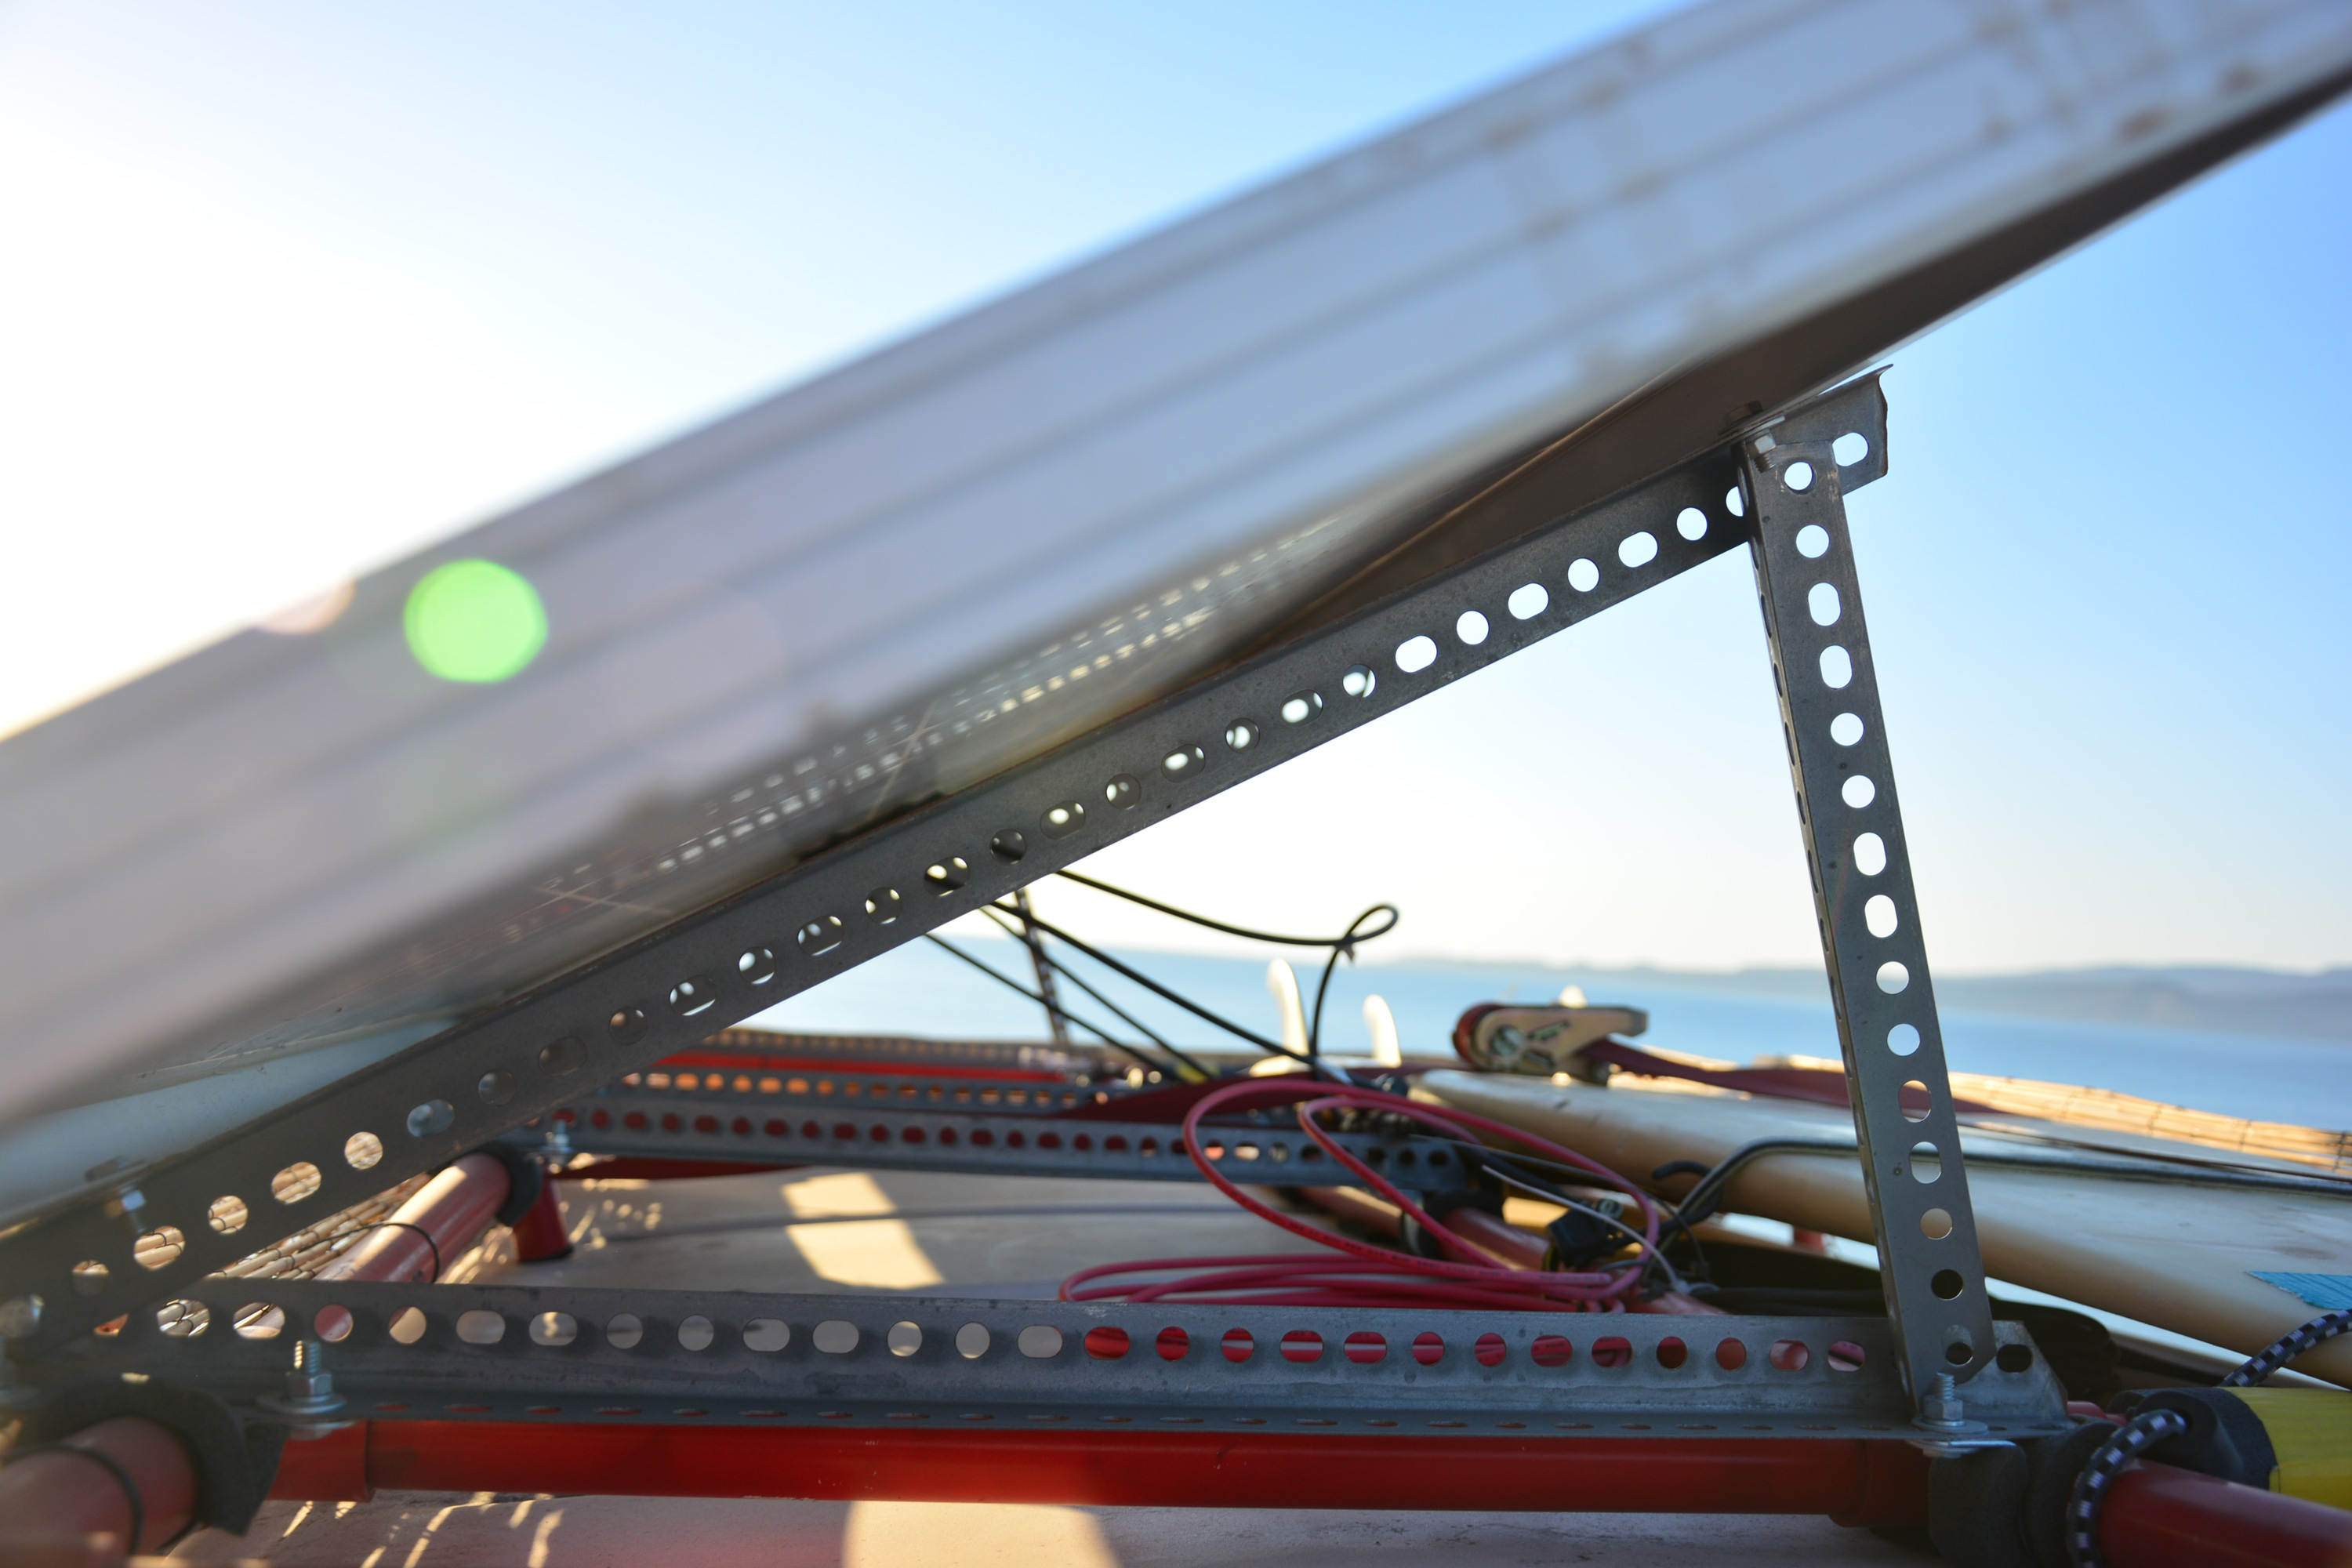
When planning the setup, we decided to mount the panels on the roof of the van, so they would always charge without us having to do anything like setting them up. We built a roof rack out of PVC pipes (I know, that doesn’t sound too professional, but it turned out to be pretty cool and extremely effective) and mounted the panels on wood blocks that were clamped to the pipes. The wiring enters the car through a hole that we drilled into the roof and that is hidden under the rack (no rain in the car!). The charge controller sits in the back of the Bus where we can always see it, and the auxiliary battery lives in the engine compartment. Thankfully, VW was nice enough to mirror the passenger side battery tray in the engine compartment on the driver side as well, which is a perfect fit for the big heavy box that is our auxiliary battery.
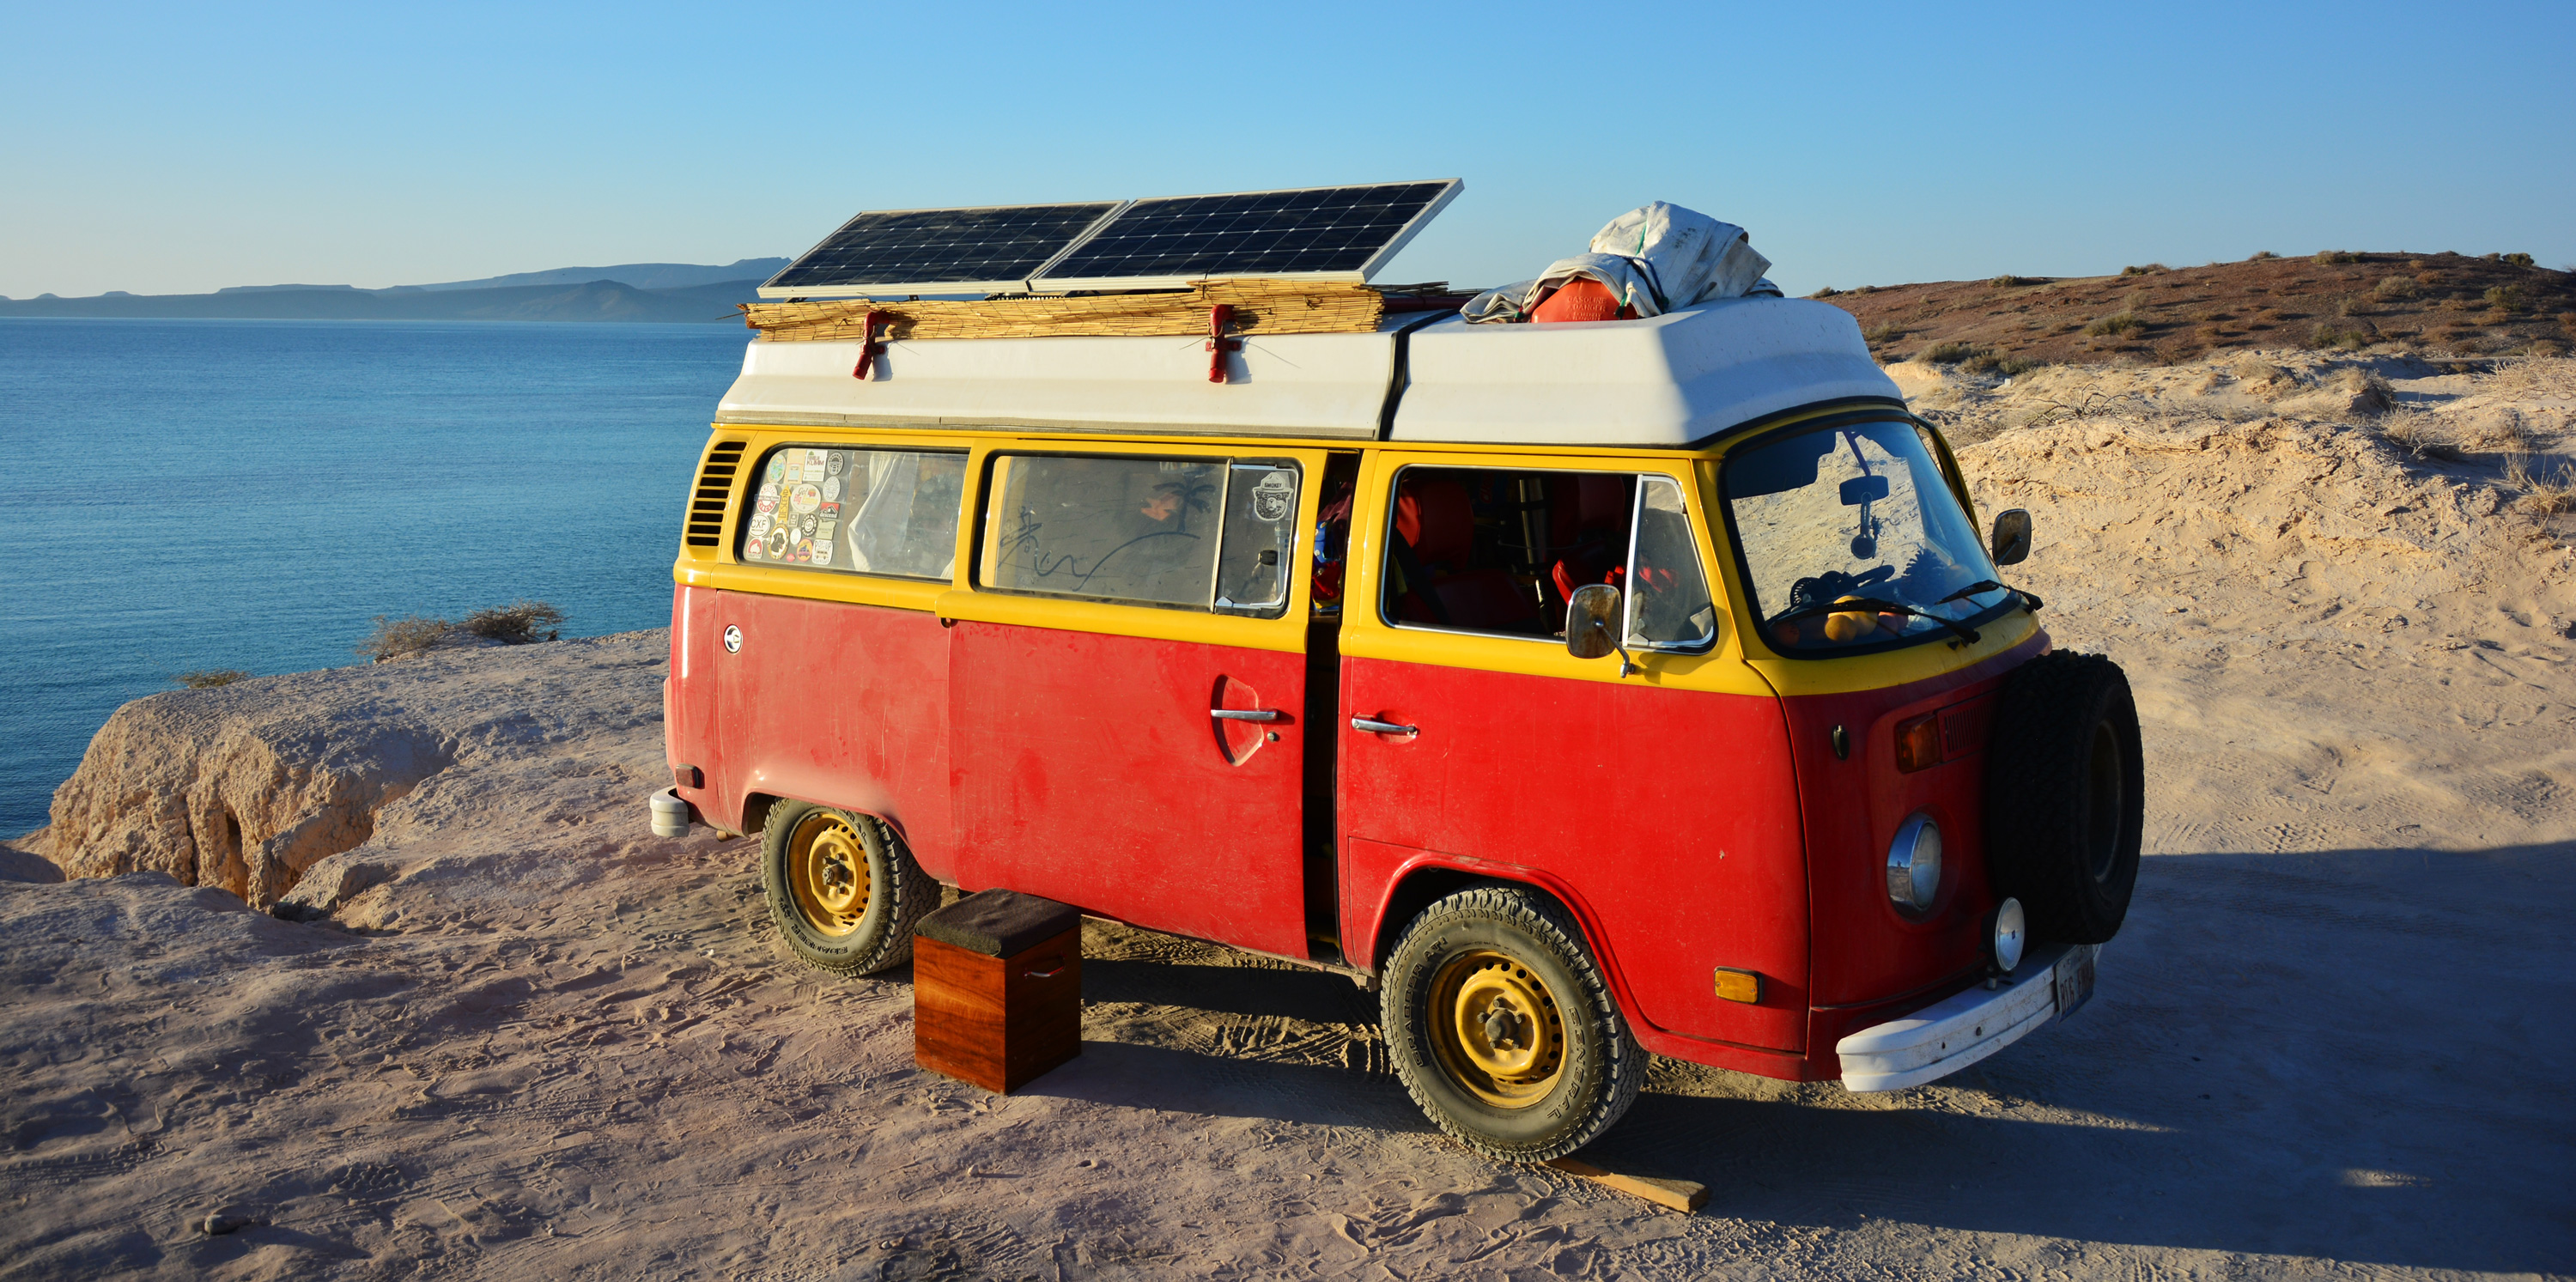
Before leaving the United States and heading for Mexico, we decided to do one major improvement to this setup. The solar panel mounting was nice and secure on the roof, but we realized it would be much better if we could angle the panels towards the sun (before they would always point straight up and were not adjustable) and thus increase their efficiency. Further, we wanted to be able to take the panels completely off the van, so we can park in the shade to escape the sweltering hot Central American sun and still get the full solar charge. We exchanged the wood blocks for metal bars, which we could bolt into another set of metal bars on our roof rack. This way, we can either take out the bolts on one side of the panels and use the other bolts on the other side as hinges to angle up the panels, or we can take all the bolts out to remove the panels completely. A 10-foot extension cord for the wiring ensures the panels remain connected to the car.
You may have also noticed Big Emma’s new “tiki” look since entering Mexico. We decided to add a bit of rattan around our roof rack so we don’t have a lot of people in Central America asking themselves the question “Hey, are those solar panels? How do you remove them?” With this addition, a person of normal height standing on the ground will no longer immediately recognize the contents of our roof rack.
Performance: rain or shine?
So, how’s our system holding up? As I mentioned before, we’ve never run out of juice, which is definitely a success. Now that we are in Mexico and the only icon the weather forecast seems to know is a cloudless sun, power is never a problem. The battery charges completely, every day, and the charge controller even reports it being full long before sunset. However, this was not always the case. Back in Alaska and the rainy Pacific North West in the wet months of winter, it was a very different story. While sunshine quickly brings the power output to over 50% of the nominal capacity of the panels, a cloudy day might never let it rise over 25%. With the power draw from the fridge and our phones and laptops charging, that is enough to keep the battery from running out, but the charge level doesn’t rise. This way, we spent weeks with a battery never charged over 20% - in constant fear it might die on us (which would mean we would need another $400 battery). It never did though, which I guess says something about its quality.

This article is much different from what we normally write. Solar is a hot topic in the vanlife community, and we thought it might be helpful to share our experiences. Do you have further questions, or is something missing that would like to know about? Leave a comment below and we promise we’ll get back to you.
Also, do you like this kind of post? Should we write more stuff like this? We’d love to know what you think!